| Applies To | |
| Product(s): | OpenPlant CONNECT Edition Update 9 |
| Version(s): |
10.09.00.74 |
| Environment: | Windows 10 (64-bit) |
| Area: | Data Manager-Tag Management |
| Subarea: | PlantSight Integrated WorkSet |
| Original Author: | Deepak Singh, Bentley Product advantage Group |
Overview
From OpenPlant Update 9 release, new feature has been released for handling tags in PlantSight to be used with OpenPlant applications like OpenPlant Modeler and OpenPlant PID.
Background
In this wiki article, we will explore the fundamental of Tag Management using Engineering Data Manager from the PlantSight portal.
A. Pre-requisite
- To use the Tag Management portal, we need to have PlantSight registered project.
- WorkSet must be associated and Setup with a PlantSight project.
- Ensure that desired applications are enabled for workset like OpenPlant Modeler and OpenPlant PID.
Note: Provision tool has rebranded as Setup in OpenPlant Update 9. Refer image as shown below.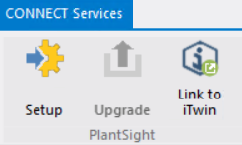
B. Loading Tag Management Portal
- Load OpenPlant Project Administrator.
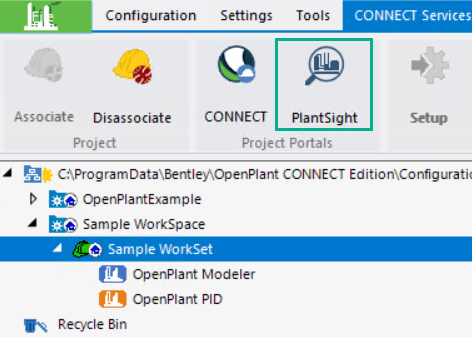
- Select an associated workset and from the Project Portals ribbon group and select PlantSight. Refer to the image below.
- Enter login credentials if prompted.
- Once logged in successfully, notice the in left-hand pane, Data Manager service is enlisting.
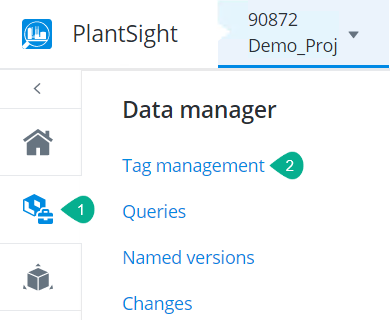
- Click on Data Manager > Tag Management as shown below.
C. Concept of Creating Tags.
- Engineering Data Manager allows creating single tag as well as bulk tag creation.
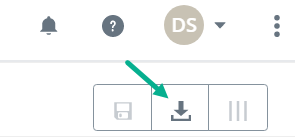
- For bulk tag creation, we need to import data or tags from an external data source like an excel file. Please note that input data must be in the recommended format. Sample format can be downloaded from Export Template icon as shown below.
- Single tag creation can be evoked with the below-shown option.
- Any type of new tag definition or creation of tag will be stored to Unsaved Changes first. Once saved, selected tag node definitions will move to iModel.
- Associated Items (PBS or WBS) must be created first as tags for pipeline need those items as necessary components.
- Any defined tag when modified will be moved to unsaved changes.
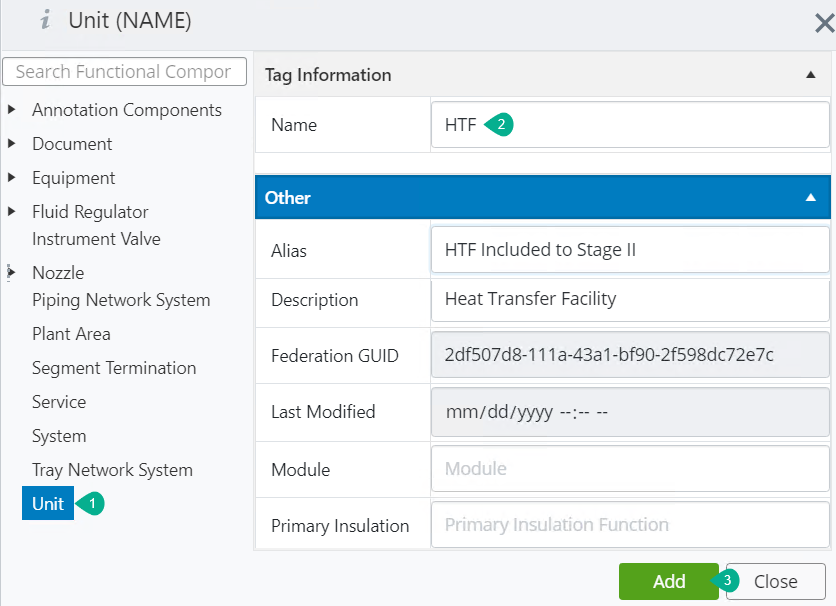
D. Single Tag Creation
- Click on Single Tag Creation icon.
- Define associated items first, like Unit, Service, Plant Area & System.
- Select the respective class and enter details in Tag Information & Other category.
- Click on Add once done. Sample image for reference as shown below.
- Notice that once added, defined class enlisting under Unsaved Changes as shown below.
- Click on the Save icon to move the defined tag into iModel.
- Tag moved to iModel as shown below.
E. Utilization of Tag in OpenPlant
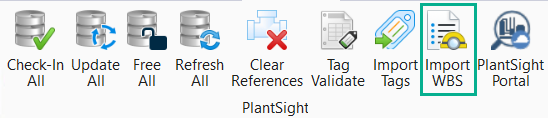
- To utilize the created/defined tag, load desired OpenPlant application.
- The first step is to Import WBS items from iModel for the OpenPlant Modeler application. Refer to the image below.
- Once WBS items get imported, the successful message can be seen from the message bar.
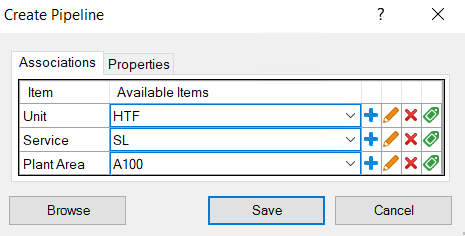
- Consider the example of Pipeline creation. Click on Create Pipeline
- Notice that the Browse option is enabled, click on it to show tags defined in iModel.
- From the Tag Browser dialog, select the desired Pipeline and click on OK. Refer image as shown below.
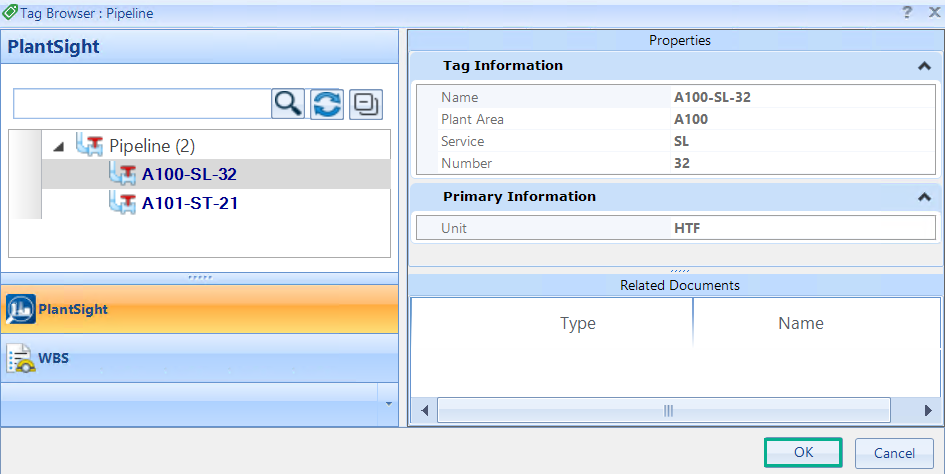
- Based on the defined tag, Associations and Properties are populated automatically. Click on Save.
F. Concept of Tag Manipulation
- Editing any tag from iModel will move the tag to unsaved changes first.
- If the defined tag has been used in the OpenPlant application & check-in operation has been performed to PlantSight, then those tag names won’t enlist in Tag Deletion dialog for delete operation.
G. Edit Mode
- Edit Mode for tag can be evoked using below shown icon.
- With Edit Mode, properties can be added and modified. Please note that only associated item values can’t be modified using Edit Mode feature.
- Select any tag in the case Pipeline tag and evoke Edit Mode.
- Notice that blank properties can be seen where values can be defined as desired.
- Enter desired value and click on tick mark to update. Refer to the image shown below.
- Notice that color coding has been changed for the edit tag. Also, changes are showing to unsaved changes. To keep this change, click on Save to move it to iModel.
H. Tag Edit
- Tag Edit feature can be evoked using below highlighted tool.

- Select a tag that contains associated items like Pipeline tag and evoke Tag Edit feature.
- A dialog will prompt where association can be selected from drop-down. Once done click on Update to move the edited tag to Unsaved Changes.

I. Tag Delete
- Tag Delete feature can be evoked using below highlighted tool.

- Evoke tag delete tool selecting respecting node. It will prompt Tag Deletion
- To dialog only those tags will enlist that can be deleted. If a tag in is use with OpenPlant and synced to PlantSight those tags won’t enlist to Tag Deletion dialog.
- Select desired tag and click on Delete to delete the marked tag.
See Also
Still a Problem?
If the above problem persists, then please create a Service Request and contact the Bentley Product Advantage group. Please include a list of all relevant details to get in depth analysis for a solution or workaround.