
Original Article Date: June 3, 2003
With thanks to Eric Cooper for contributing this tutorial that will show you how to convert MicroStation V7 cells into DWG blocks.
When sharing data between AutoCAD and MicroStation users it may be necessary to become rather creative in your workflows. Take the issue of saving cells in a cell library out to DWG blocks. Although there may be more than one way of accomplishing this, this is the method we use in our shop and uses a utility called CellUtil which is available from Snutter.
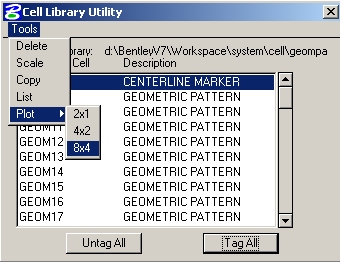
To get started, create a new design file and attach the cell library you want to convert to DWG blocks. We now need to place one instance of each cell into the file. Of course you can do this manually, but using Snutter’s CellUtil makes this a snap to do. Just load the app, go to Tools > Plot and select the appropriate option.
 |
Once the cells have been placed into the design file, export the file to a DWG file and open it in AutoCAD.
In AutoCAD, delete all the entities and then create either create a new DWG file or open the DWG file that you need to place the blocks into.
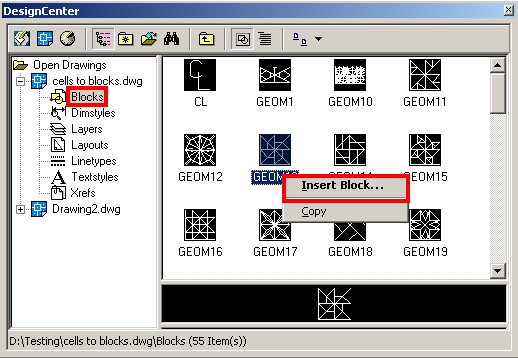
In the new file go to Tools > AutoCAD DesignCenter and click on the + beside the exported drawing name. In there you will see a category called Blocks and each indivicual block will be shown on the right side. To insert a block, simply highlight it, do a right-click and select the Insert Block option. That’s it. Like Inga says, it’s as easy as 1,2, and 3!
 |
AskInga Article #143