
Original Article Date: Jan 1, 2001
Originally titled The Power of Keyins - Part 1 and published in the June 2000 issue of the MicroStation Manager Magazine, this article explores MicroStation's keyins.
2001-01-29 Original posting date.
2006-09-19 Overhauled and updated.
Although macros are powerful and wonderful for streamlining various tasks for the MicroStation user, they require a certain amount of programming knowledge. And, as a newer user, you may not have these skills…or if you're like me…you may be missing the portion of your brain that enables you to learn these skills. Fortunately, MicroStation offers a robust set of customization tools, which allows the non-programmer and newer users to streamline their workflow.
Before we go any further, we need to understand the world of MicroStations Keyins. Almost any function that MicroStation performs is activated by a keyin or typed instructions. For example, when you activate the Place Circle tool and you set the method to Diameter, the key-in associated with that action is Place Circle Diameter. Likewise, when you access the References dialog from the Primay tool box, MicroStation is using the key-in mdl keyin REF DIALOG REFERENCE.
Nearly all keyins used by MicroStation can be obtained from the Key-in browser which can be opened a variety of ways:
1) Via Utilities > Key-in
2) Via Help > Key-in Browswer
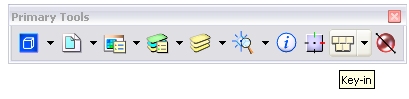
3) From the Primary Tools tool box
 |
4) When at Home in MicroStation V8 XM Edition, just press ENTER.
See tip.asp?TipID=601
5) Or by activating the default F9 function key in MicroStation V8 or newer. Note that if the key-in window is already open, pressing this key will send the input focus to it.
Once opened, you'll notice that the Key-in window consists of:
Keyin Field
When your cursor is blinking in this field it has the “input focus” and allows you to type in a command. After typing in any command, it must be followed with the key to send the instructions to MicroStations brain. Alternatively, you can also click the Key-in button in MicroStatation Pre-V8, or the Run Keyin button in the current versions.
 |
List Boxes
These four columns are lists of keywords and will automatically highlight as you type the characters for the command. Since MicroStation recognizes abbreviations there is no need to key-in the entire command.
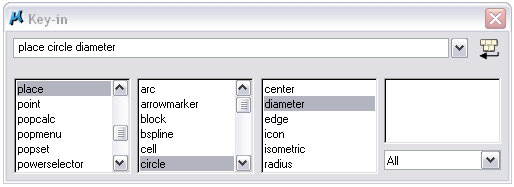 |
For example:
Key in pl followed by a space - the keyword place will highlight in the first column it will be entered in the key-in field. The second column will now show a list of all associated keywords to the place command. Now key in b followed by a space and the keyword block is highlighted in the second column. Finally key in r followed by a space and the keyword rotated is selected.
 |
Key-In button (MicroStation Pre-V8) / Run Key-in button (MicroStation V8)
When either of these are poked, it's the same effect as pressing the Enter key on your keyboard.
Tables Button (MicroStation Pre-V8 only)
When clicked, you'll be presented with a list of tables which represent particular tools, mdls or functions within MicroStation. Each table consists of unique keyins associated with that function and, if selected, the Command List Box will only present those available keyins. To return to MicroStation's key-ins, select the table called MicroStation.
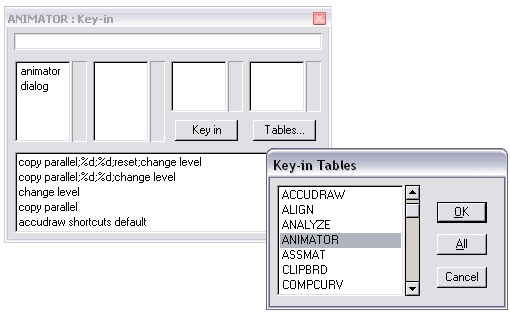 |
Keyin History
The bottom portion of the dialog displays a history of the last keyins entered. All keyins in this list are available for activation by simply double-clicking its entry.
If you're short on real-estate space there's a couple of things you can do:
Resize the dialog to eliminate the history and lists, or dock it along the top / bottom of your screen.
 |
Notice that, when docked or re-sized, the keyin window automatically presents the Browse Key-in button which allows for quick and easy access list boxes.
 |
Although understanding key-ins is important, it's not terribly practical to type in commands when they are available directly from the interface with the click of a mouse. However, having said that, let's take a look at how the key-ins can help you work more effectively by using them with function keys!
Function Keys
This customizable feature allows the user to access a set of commands via the function keys found on most PC keyboards. These commands or function key assignments are stored in an external file simply called a function key menu. The delivered default function key menu can be found in the following folder: ...\workspace\interfaces\fkey\funckey.mnu.
In order to utilize function keys you may want to create your own menu containing frequently used commands and tools. Let's suppose that we want Alt+F2 to activate Active Angle by 2 Points...which is not found in any standard toolbox!
From the Workspace menu, select Function Keys and MicroStation will respond by opening up the Function Keys dialog box. This dialog box will allow us to modify existing assignments as well as create new ones.
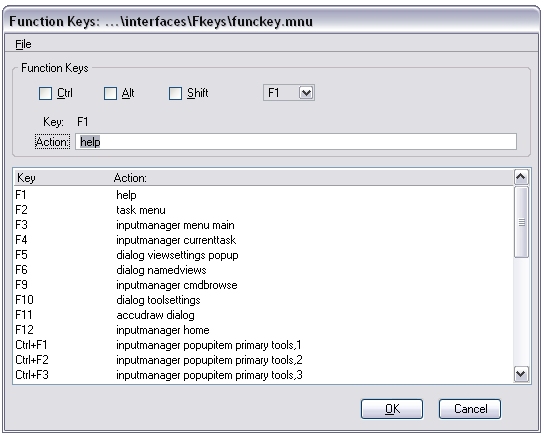 |
In the top portion of the dialog, we are able to select which modifier to use with the function key: CTRL, ALT, and SHIFT. These modifiers can be used alone or in combination to provide up to eight possible commands per function key:
Fkey
Ctrl + Fkey
Alt + Fkey
Shift + Fkey
Ctrl + Alt + Fkey
Ctrl + Shift + Fkey
Alt + Shift + Fkey
Shift + Alt + Ctrl + Fkey
Enable the switch for Alt and select F2 from the pick list. In the Action field enter the command active angle pt2 and press OK.
 |
Once the new definition has been created, it's important to save our changes to the menu file. We can click on the OK button in the Function Keys dialog box, but this would simply update the default menu. Since the function key menu file is a separate external file, it may be to your advantage to save the modified menu to a new file. This can be done from selecting File > Save As.. and entering a unique file name.
At this point, we've created a new menu file containing our customized function keys, but it's not the active menu. To attach or activate a menu file use the key-in AM=File_name,FK - in fact, why not put this key-in in your function key menu so that you can quickly and easily attach a different menu depending upon your workflow.
AskInga Article #34