| Applies To | |||
| Product(s): | OpenPlant Modeler | ||
| Version(s): | 08.11.09.XXX | ||
| Environment: | Windows 7 64 bit | ||
| Area: | Component | ||
| Subarea: | Graphics | ||
| Original Author: | Rahul Kumar, Bentley Technical Support Group | ||
| |
Overview
During Modeling in OpenPlant Modeler, Custom Tee can be modeled using "Generic Branch' option.
Problem Description
Requirement was to Place a custom Tee, a Star Type Tee ( Branch equally divided at 120 Degree). Using "Generic Branch' option, user may place this in OpenPlant Modeler. Below are the steps mentioned using default project setup present in OpenPlant Modeler.
Steps to Resolve
- Launch OpenPlant Modeler. Select working Project Unit.
- Open the Standard Preferences dialog and set the pipeline, specification and component values. Select default Spec mEX-OPM for size DN100.
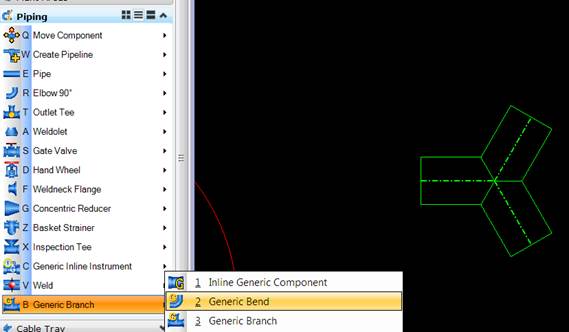
- Select a branching component placement option from the Piping task bar. See image below.

- Select a Placement Point option from the Place Component dialog. (This can also include a Generic Branch).
- Click the Properties tab and define any additional component properties.
- Set Branch angle and Run angle to get the desired rotation for it.
- Pick a point in the drawing, or select an open port of an existing component.
- An outline of the component displays.
- Pick a point in the drawing to define the rotation and complete the placement process.
- By default, the placement command remains active until another command is selected.
- Click the Element Selection option to end the command.
Comments or Corrections?
Bentley's Technical Support Group requests that you please confine any comments you have on this Wiki entry to this Comments or Corrections?" section. THANK YOU!