
This Client Server article is republished in its entirety from 2004 for reference purposes.
March 30, 2004 - Title Block Integration is a process for exchanging information between MicroStation and Bentley ProjectWise from a single source of information stored in the database. The primary purpose of Title Block Integration is to automate the placement of a document's attribute information into a MicroStation design file. The attribute data in ProjectWise is linked to the tag data in the design file.
Title Block Integration can be quite complicated. This article will describe some of the basic Title Block functionalities and explain how to set up a simple Title Block.
Setting up
There are three basic steps involved in setting up Title Block Integration:
Create the Title Block tag sets in the MicroStation design file
Create Attribute Exchange rules in ProjectWise
Update the Title Block tags in the design file with the document information from the ProjectWise database
Create Title Block tag sets in MicroStation
You will use the Define Tag tool to create the tag information in the design file. The tag sets and tags must be entered in lowercase text only. Keep it simple; do not use any extraneous characters. Use meaningful names so you'll know what ProjectWise bindings you will be linking to.
The tag set in the design file will equal the Attribute Class in the Attribute Exchange rules. The tags will equal the attributes in the Attribute Exchange rules.
Example: Create a tag set called "info" and add the following tags: "filename" and "filesize." When you define the Attribute tags, the Variable and Default options should be enabled. It also helps if you enter a default value. You then must attach the tag set to a MicroStation object, (a graphical representation of the Title Block). After you attach the tag set to your Title Block, you can move the default values to their appropriate positions and adjust the text characteristics. You can also create a cell from the Title Block and the tag elements. The Title Block cell can then be used as a template and can be placed in any MicroStation design file.
Steps to create tag sets and tags
Launch MicroStation and open a new DGN file.
Create the graphical representation of the title block.
To create the tag set, go to Element >Tags> Define
On the SETS side of the dialog, click the Add button and give your set a name, (all lowercase letters). (Example: info).
Click "OK".
To create the tags, highlight your new set name
On the tags side of the dialog box, click ADD
Give your tag a name (all lowercase letters). (Example: filename or filesize).
Make sure "Variable" and "Default" are checked and give your tag a default value
Add as many tags as you need
When you are finished, close the Tag Sets dialog box
Figure 1
You will now need to attach the tag set to a MicroStation object, (a graphical representation of the Title Block). To do this, make sure you have your Tags toolbox turned on (go to tools>toolboxes and check "Tags"). The toolbox will look like that in Figure 1.

Figure 2: Attach Tag tool

Figure 3
Figure 4
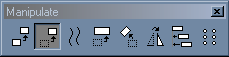
Figure 5

Figure 6: Move tool

Figure 7
Figure 8: Fence command

Figure 9: Define Cell Origin
Click on the Attach Tag tool. The Attach Tags dialog box will come up.
Highlight your tag set. You will be prompted to identify the element.
Place a data point on the element you want to associate to the tag set (Figure 2).
If you have set default values for your tags you will be able to see them, and it will be easier to place the tags (Figure 4).
Click another data point to place your tags.
Close out of the Attach Tags dialog box.
You can now use the Move tool to move the individual tags to a more appropriate location (Figure 7).
At this point you can create a cell from the Title Block and tag elements. The Title Block cell can then be used as a template and placed in any MicroStation design file.
To create a cell:
First you will need to either create or attach a cell library:
To create a new cell library, go to Elements>Cells>File>New.
Choose a folder for your cell library and give it a name. Click "OK".
To attach a cell library, go to Elements>Cells>File>Attach.
Navigate to the cell library you want to add your cell to and click "Open".
To create a cell for your cell library:
Use the Fence command to place a fence around the objects you want in your cell (Figure 8).
Click on Define Cell Origin (Figure 9) and place a data point on one of the elements within your fence (This tool is usually located in the main tool bar, if it is not there, go to Tools>Toolboxes and turn on cells).
In the cell library dialog click "Create" and give your cell a name. Make sure type is set to "Graphic", then click "Create".
To place the cell in another file, open a DGN, go to Elements>Cells>File>Attach.
Navigate to the cell library you created, highlight it, and then click "OK".
Double click on the cell you want to attach.
Move your cursor to the design plane and you should see the cell.
Place a data point where you want the cell to be located.
Creating Attribute Exchange rules
Attribute Exchange rules are created in the ProjectWise Administrator. They control which document attributes are updated in place of the default values in the MicroStation tags. They also control how and when the attributes are updated.
Under the Attribute Exchange rules there is a category for MicroStation Title Blocks. Right click on MicroStation Title Blocks and select New Attribute Class. The Attribute Class must match the tag set name created in the MicroStation design file. Above, we created a tag set called "info", therefore the attribute class needs to be called "info".
As in MicroStation, the attribute class and attributes must be created in all lowercase text. To create an attribute, right click on the attribute class "info" and select New Attribute from the Attribute Wizard Loads menu. Follow the steps in the wizard to create a Title Block attribute. The attribute name must match the tag in the MicroStation design file. Above, we created the tags "filename" and "filesize".
In the wizard you will create the binding for the associated document attribute. The Attribute binding must have a selected environment. After selecting the environment, choose the ProjectWise database attribute you want to associate. Example: "DocFileName" and/or "DocSize".
Steps to create Attribute Exchange rules:
Launch ProjectWise administrator and log in to your data source
Expand Attribute Exchange Rules
Right click on "MicroStation Title Blocks" and choose New>Attribute Class
Under the General Tab>Identification, give your attribute class the same name as you gave your tag set, then click "OK"
Example: info
Creating the bindings
Highlight, then right click on your new attribute class
Choose "New>Attribute". The new Attribute wizard appears. Click "Next"
Give your new attribute the same name as one of the tags you created
Example: filename
Example: filesize
In the binding on the Attribute page, click Add
In the Add Binding dialog, choose your environment, then choose the property type (Document, Folder, or Environment)
Now choose the attribute and click "Next"
In the Formatting Bindings page, click "Next"
Now click "Finish"
Repeat these steps until you have created all the bindings for all of your tags.
Title Block Update File Conditions
Update File Conditions allows you to control when ProjectWise will trigger the events to update the tags in the MicroStation design file. This is done through the MicroStation Title Blocks properties.
In ProjectWise Administrator, right click on MicroStation Title Blocks and select Properties from the menu. There are three options under Update File Conditions: Document is "Opened", Document is "Checked Out", and Document is "Copied Out".
When set to "Opened" the attribute tags will be updated when you open the design file in MicroStation, either from the ProjectWise Explorer or from the desktop.
When set to "Checked Out" the attribute tags will be updated only when you right click on a design file in ProjectWise Explorer and choose Check Out from the menu. The design file gets checked out of ProjectWise and placed in the Working directory. During the check out, MicroStation loads in non-graphics mode and processes the Title Block tags in the design file.
When set to "Copied Out" the attribute tags will be updated whenever a design file is copied out of ProjectWise. This includes when you right click on the design file in ProjectWise Explorer and choose Copy Out from the menu or when you check out, copy out, or open a master design file. If a master design file has ten references attached, MicroStation will load in non-graphics mode and attempt to update the Title Block tags for each of the ten reference files.
MicroStation Title Block command
There are three commands you can use to manipulate a document's attribute data. Open a design file through ProjectWise and make sure the bentley\microstation\system\mdlsys\required\mcmtb.ma is loaded. Go to utilities>MDL applications. Underloaded applications will look for MCMTB.
If the mcmtb.ma is not loading when you launch MicroStation, check your c:/program files/bentley/program/mdlsys/required/ folder for the Title Block loader, mcmtbldr.ma. This driver automatically tells MicroStation to load the mcmtb.ma. If you are running multiple versions of MicroStation, the loader will only get installed up to the last build of MicroStation that you installed. You can copy it to the others if you need to.
Use the Utilities>Key-ins dialog to implement the following commands:
· Title Block Modify
· Title Block Updatedms
· Title Block Place
Title Block Modify opens the ProjectWise document's Properties dialog in MicroStation and allows you to manually update any of the information. When you save the properties and close the dialog, the Attribute tags in the design file are automatically updated.
Title Block Updatedms takes the default current values from the Title Block tags and updates the values in the database. This command is used if you manually update the default values in the Attribute tags using the Edit Tag tool and need to submit those values back to ProjectWise.
Title Block Place loads a dialog that allows you to place a Title Block cell in the design file. As soon as you drop the cell in the design file, the Attributes tags get automatically updated.
See Also
MicroStation Desktop TechNotes and FAQs
ProjectWise TechNotes And FAQs
Comments or Corrections?
Bentley's Technical Support Group requests that you please confine any comments you have on this Wiki entry to this "Comments or Corrections?" section. THANK YOU!
Original Author: Bentley Technical Support Group